DLTK's Crafts for Kids
 Dolphin Craft
To give you a feel for the size, the dolphin in the picture is about 1 foot long.
This page may take a minute to load (I included lots of photos in the hopes that it would make the instructions easier to understand).
Materials:
- The only "store bought" material is paint (tempra, poster or finger paint all work well... Acrylic paints work great, but don't wash out of clothes!!!) We mixed white and black to make our own grey. Alternatively, you can mod podge (mache) on 1 inch squares of grey tissue paper. Or make a "funky dolphin" by maching on 1 inch squares of patterned tissue paper or napkins
- paint brush
- newspaper
- toilet paper or paper towel
- paper towel roll
- toilet paper roll or cardboard tube,
- scissors
- tape (masking or scotch tape)
- ONE OF: white glue, mod podge OR paper mache paste (1 part flour to 5 parts water... Boil about 3 minutes and let cool)
STEP 1: BUILD THE FRAME:
 I
recommend you quickly review all the instructions before starting the project.
I
recommend you quickly review all the instructions before starting the project.
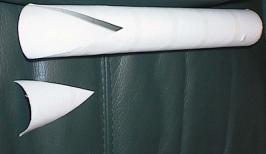
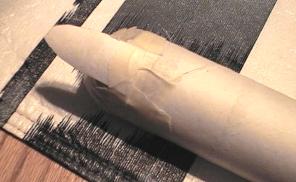
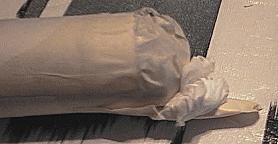
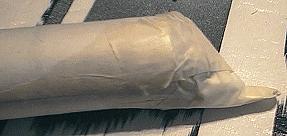
- Take the paper towel roll and cut a V shape out of one end
- Discard the small piece
- Pull the two ends of the cut together and tape (it will crunch up a bit, but we'll fill in the dips later.)
- At this point, you can stuff the whole thing with newspaper or toilet paper so it's a bit more solid.
- The open end is the head, and the narrow, taped end is the back.


- Take a toilet paper roll & cut lengthwise, so you can unroll it.
- Draw on a dolphin tail shape and cut it out.
- Because you used a toilet paper roll, your tail will be nice and curvy
- Tape the tail to the back of the paper towel roll
 Take a 1/2 sheet of newspaper and scrunch into a ball.
- Insert ball into open end of the paper towel roll.
- This will be the rounded head
- Tape it well
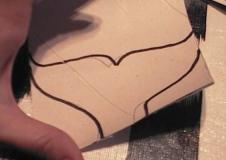
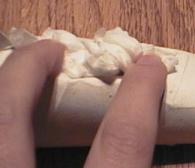
 Take a piece of cardboard (old cereal box) or another unrolled
toilet paper roll and cut out a top fin shape (see photo).
Take a piece of cardboard (old cereal box) or another unrolled
toilet paper roll and cut out a top fin shape (see photo).- Cut a U shape snout (mouth) for the dolphin.
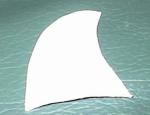
- Cut two bottom fin shapes ("wings" as my 2 year old called them) (same as top fin shape in photo, but a bit longer and skinnier)
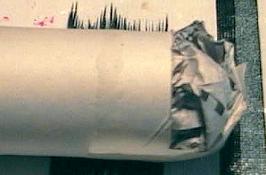
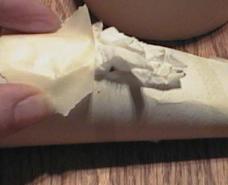
 Tape/glue on the top fin (this step is a bit finnicky... just
put big pieces of tape on either side of the fin and tape it on the body).
Tape/glue on the top fin (this step is a bit finnicky... just
put big pieces of tape on either side of the fin and tape it on the body).- Shannon sent in the following suggestion for the top fin: Cut about an extra inch to the bottom of the fin. Then cut about an inch straight up in the middle. Fold in the flaps in opposite directions, then tape the flaps to the back.
- Tape/glue the mouth to the bottom of the head
- Tape/glue bottom fins (wings) to the bottom of the body.
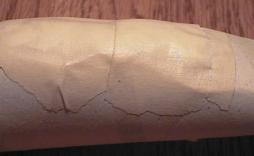
STEP 2: MACHE:
- Tear newspaper into strips about 1 to 2 inches wide. You can have some that are longer and some that are shorter.
- Paper mache the entire thing
- You don't want more than 4 layers of mache added or it won't dry properly. I usually tell the kids not to add more than 2 layers (when they inevitably overlap things a bit more than they should, we end up with 4).
- Use shorter pieces when macheing around the fin and tail if it's too finicky (or have younger kids mache the nice easy body and save the hard parts for yourself).
- Let mache dry (set outside on a nice sunny or breezy day and it will dry very quickly).
- Optional: Apply a second coat of no more than 4 layers and let dry (one coat is enough, but the more coats you add the sturdier it will be ... especially if you've added mache limbs and tail). Let dry. Apply a third coat. Let dry.
- The very top layer of mache can be done with white paper. This will make it easier to apply paint.
STEP 3: PAINT:
- Paint with grey paint.
- Decorate (add a white blow hole and black eyes or glue on wiggly eyes).
Print friendly version of these instructions