DLTK's Crafts for Kids
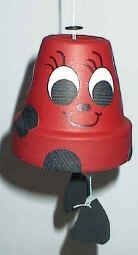
Ladybug Terra
Cotta Wind Chime Craft
This is a fun craft that young children can make (most of the features are template pieces that are glued on). It's also fun for older children or even adults who can use paint techniques for decorating the project instead of the template pieces.
This takes more store bought supplies than most of the projects on my site, but it's a lot of fun to make as a gift.
Materials:
- terra cotta pot (size doesn't matter much if you're painting the details... But the template pieces are for a 4 1/2 inch pot... The 4 1/2 inches refers to the diameter across the top of the pot).
- red acrylic paint
- black permanent marker or black acrylic paint
- Paint brush (we used sponge brushes ... About 25 cents from the craft store or hardware store).
- small piece of black fun foam
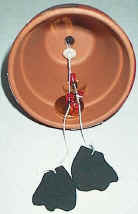
- wool or string
- hole punch
- 2 buttons or metal washers that are bigger than the hole in the terra cotta pot -- black or red buttons would be best, but it doesn't really matter.
- a few craft beads or hardware store metal washers (this is what will make the sound).
- If using the template:
- printer
- paper
- mod podge or white glue
- If painting the decorations:
- black acrylic paint
- fine paint brush
- If hanging outdoors
- spray on varnish or acrylic spray (you could use brush on, but the spray on is nice and quick)
Instructions:
I'm assuming you'll be using the template pieces in these directions. If you aren't, just skip printing and pasting the pieces and paint on the design by hand.
|
||
|
 |
 |
|
|
|
|
|
|
|
|
|
Templates:
- Close the template window after printing to return to this screen.
- Set page margins to zero if you have trouble fitting the template on one page (FILE, PAGE SETUP or FILE, PRINTER SETUP in most browsers).
Template
Print friendly version of these instructions