DLTK's Crafts for Kids
Creative Green Thumbs: 20 DIY Decorated Pot Projects for Gardening with Children
POSTED ON MAY 16, 2023 BY LEANNE
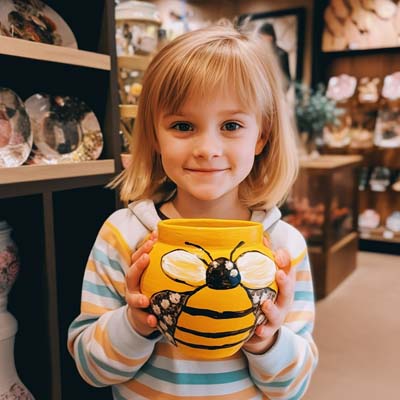
 Gardening is a fantastic way for children to learn about nature, develop patience, and create a strong connection with the environment. Decorating pots for their plants adds a creative and personal touch, making the experience even more enjoyable. In this blog post, we'll explore 20 different DIY decorated terra cotta pot projects for gardening with children, organized by age ratings. These projects are perfect for spending quality time together, and they'll help foster a love for gardening in your little ones!
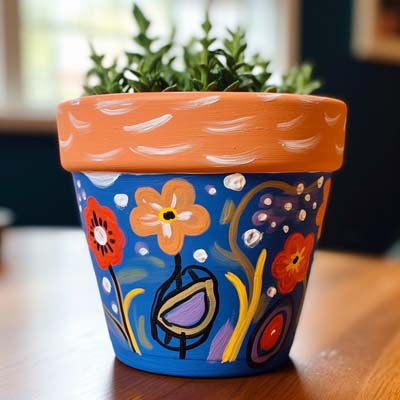
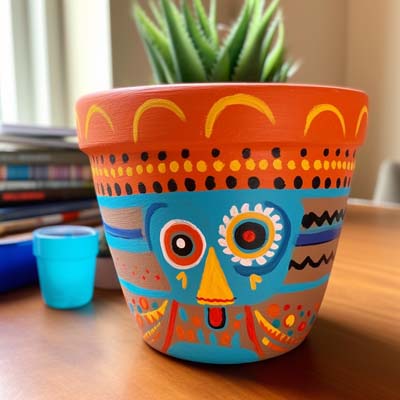
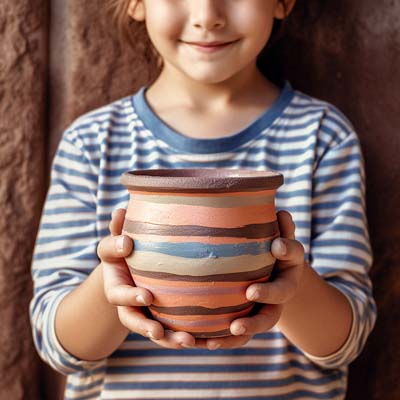
Painted Pots
I'm going to give you lots of options for decorating terra cotta pots, but before I do I wanted to remind you that you can just provide pots and a variety of acrylic paint colors and let the kids paint them however they're inspired!


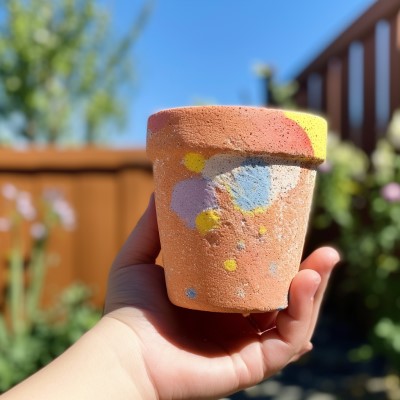
Fingerpaint Flower Pots
(Ages 2-4)
Provide non-toxic finger paints and let the little ones unleash their creativity painting terracotta pots. The colorful, abstract designs that emerge will brighten up any garden or windowsill. This activity not only encourages artistic expression but also helps improve fine motor skills.
Materials:
- Terracotta pots
- Non-toxic finger paints
- Smocks or old clothes for the kids
- Wet wipes for cleanup
Instructions:
- Make sure the children are dressed in clothes that can get messy or wear a smock.
- Give each child a terracotta pot and let them choose their favorite colors of non-toxic finger paint.
- Encourage them to dip their fingers in the paint and make designs on the pot.
- Allow the painted terra cotta pots to dry completely before using them for plants.
- Remember to clean up promptly with wet wipes, as finger paint can be difficult to remove once it dries.
Sticker Fun Pots
 (Ages 2-4)
Let kids decorate pots with their favorite stickers, creating a unique and personalized design. This activity is perfect for younger children who may not have the fine motor skills needed for painting but still want to contribute to the garden decor. Choose stickers with garden themes, animals, or their favorite characters for added fun.
Materials:
- Plain pots (plastic or terracotta)
- Variety of stickers (make sure they're waterproof if the pots will be outside -- there are quite a variety of plastic coated stickers available)
- Optional: clear, outdoor-safe sealant
Instructions:
- Ensure the pots are clean and dry.
- Give your children a selection of stickers to choose from. They could be garden-themed, animal stickers, or their favorite characters.
- Allow them to place the stickers however they like on their pot.
- If you want to make the design more permanent, consider sealing it with a clear, outdoor-safe sealant.
Handprint Pots
(Ages 2-6)
Capture your child's handprint on a pot with non-toxic paint, creating a keepsake as well as a decorative planter. Simply paint the child's hand and gently press it onto the pot to make this cute terra cotta pot craft. This activity is a beautiful way to document your child's growth and create a sentimental garden piece.
Materials:
- Terracotta pots
- Non-toxic paint in your child's favorite color(s)
- Paintbrush
- Clear, outdoor-safe sealant
Instructions:
- Paint your child's hand with a generous amount of non-toxic paint using the paintbrush.
- Carefully press their hand onto the pot. Make sure every finger makes contact with the pot surface.
- Gently lift their hand straight up to avoid smudging the print.
- Allow the paint to dry completely.
- To preserve the handprint, apply a clear, outdoor-safe sealant over the print and the entire pot if desired.
Sponge Painted Pots
(Ages 3-6)
 Provide sponges in different shapes and let kids dip them into paint and press onto pots for a textured design. This activity is a great way to introduce children to various textures and shapes while allowing them to explore color mixing and pattern creation.
Materials:
- Terracotta pots
- Non-toxic paint in various colors
- Sponges in different shapes and sizes
- Paint trays or disposable plates
Instructions:
- Pour different colors of non-toxic paint into separate paint trays or disposable plates.
- Show the children how to dip the sponges into the paint, ensuring that the sponge absorbs a good amount of paint.
- Let the kids press the paint-dipped sponges onto the pots, creating unique patterns and textures.
- Allow the terra cotta pot crafts to dry completely before using them for plants.
Chalkboard Paint Pots
(Ages 4-10)
Paint the pots with chalkboard paint and let the kids draw or write messages with chalk. They can easily erase and redraw as they please, making this activity perfect for children who love to create and change their designs. Plus, it's a great way to label the plants in your garden! (you'll have to redo your chalk periodically as water will wash it away eventually)
Materials:
- Terra cotta pots
- Chalkboard paint
- Paintbrush
- Chalk in various colors
Instructions:
- Ensure the pots are clean and dry. If there's any dust or dirt on them, the paint may not adhere properly.
- Using a paintbrush, evenly apply the chalkboard paint on the exterior of the pot. Depending on the brand of paint you're using, you may need to apply a few coats. Allow each coat to dry fully before applying the next one.
- Once the final coat of paint is completely dry, the pot is ready to be decorated with chalk. Hand the chalk to the kids and let them draw or write messages on their pots.
- Chalk can be easily erased with a damp cloth, so the children can change their designs as often as they like.
- If you're using these pots for plants, the chalk can also be used to label what's growing in each pot.
Decoupage Pots
 (Ages 5-12)
Use decoupage glue and colorful paper or fabric scraps to create a collage on the pot. Children can experiment with different patterns, images, and colors, resulting in a one-of-a-kind design. This activity also helps develop fine motor skills and hand-eye coordination.
Materials:
- Terracotta pots
- Decoupage glue (such as Mod Podge)
- Colorful paper or fabric scraps
- Scissors
- Paintbrush
Instructions:
- Make sure the pots are clean and dry.
- Have the children cut the paper or fabric scraps into shapes and designs of their choosing.
- Using a paintbrush, apply a thin layer of decoupage glue to a small area of the terra cotta pot.
- Stick the paper or fabric scraps onto the glue, smoothing out any bubbles or wrinkles as you go.
- Continue to add glue and paper or fabric scraps until the pot is covered in a decoupage design your child is happy with.
- Once the entire decoupage design is on the terra cotta pot, apply a final layer of decoupage glue over the top to seal it.
- Allow the decoupaged pot to dry completely before using it for plants. The decoupage glue will dry clear and leave the pot with a smooth, finished look.
Painted Rock Friends Pots
(Ages 5-12)
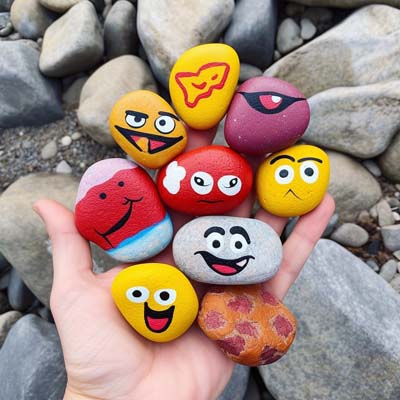 Collect small rocks with your child and paint them as cute characters or animals. Place the painted rocks inside or around the pot, creating a whimsical garden scene. This activity allows children to experiment with different painting techniques and create their own little world.
Materials:
- Terracotta pots
- Small rocks
- Acrylic paint in various colors
- Paintbrushes in various sizes
- Clear, outdoor-safe sealant (optional)
Instructions:
- Start by going on a rock hunt with your child. Look for small, smooth rocks that can be easily painted.
- Once you've collected enough rocks, wash them to remove any dirt or dust and let them dry completely.
- Encourage your child to paint the rocks as different characters or animals using the acrylic paint. They can create faces, patterns, or abstract designs.
- Let the paint on the rocks dry fully.
- If you plan to place the rocks outside, consider coating them with a clear, outdoor-safe sealant to protect the paint from the elements. Allow the sealant to dry completely.
- Arrange the painted rocks inside or around the pot, creating a whimsical garden scene.
- Fill the pot with soil and plant your favorite plants or flowers, then place your 'rock friends' back in or around the pot to complete the scene.
This activity is not only a fun and creative way to decorate your pots, but also a wonderful opportunity to get outside and explore nature while searching for the perfect rocks.
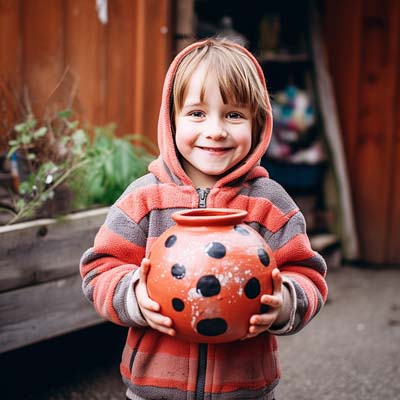
Polka Dot Pots
(Ages 6-12)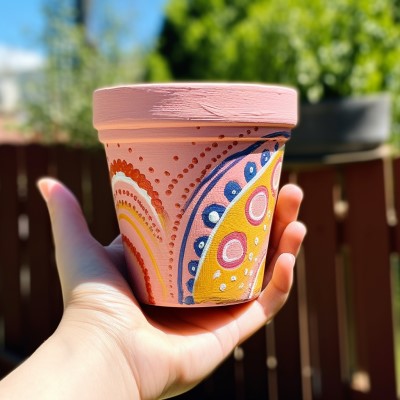
Using a pencil eraser or round sponge, kids can create polka dot patterns on their pots with paint. This simple yet effective design technique allows for endless color combinations and is an excellent introduction to pattern-making.
Materials:
- Terracotta pots
- Non-toxic acrylic paint in various colors
- A pencil with an eraser or a round sponge
- Cup of water and paper towels for cleaning the eraser or sponge
- Clear acrylic sealer (optional)
Instructions:
- Start with a clean, dry pot.
- Dip the eraser end of the pencil or the round sponge into one color of paint.
- Press the eraser or sponge onto the pot to create a polka dot. Depending on the size of the pot and the size of the eraser or sponge, you might want to create rows of dots, random dots, or overlapping dots.
- Clean the eraser or sponge in the cup of water and dry it on the paper towel before switching to a new color.
- Continue dipping the eraser or sponge in paint and pressing it onto the pot until the pot is covered with polka dots. Let your child be creative with their color combinations and patterns!
- Let the pot dry completely.
- If desired, apply a clear acrylic sealer to the pot to protect the paint. Make sure to let the sealer dry fully before using the pot.
This activity is a great way for kids to experiment with colors and patterns. The polka dot design is simple yet effective, and the process of making the dots can be quite relaxing. Plus, they'll end up with a cheerful, colorful pot that's perfect for brightening up a room or garden.
Stenciled Pots
(Ages 6-14)
Choose or create stencils with your child, and use them to paint intricate designs on the pots. This activity teaches children about precision and attention to detail while allowing them to express themselves artistically. Stenciling is also a great way to introduce older children to more advanced painting techniques.
Materials:
- Terracotta pots
- Stencils (purchased or homemade)
- Non-toxic acrylic paint in various colors
- Stencil brush or sponge
- Painter's tape (optional)
Instructions:
- Choose or create stencils with your child. You can purchase stencils at a craft store or make your own by cutting designs out of cardboard or plastic sheets.
- Position the stencil on the pot. If needed, secure it with painter's tape.
- Dip the stencil brush or sponge into the paint, then dab off the excess on a paper towel. Too much paint can cause it to seep under the stencil and blur the design.
- Apply the paint to the pot through the stencil using a dabbing motion. Make sure to cover all the cut-out areas.
- Carefully remove the stencil before the paint dries to prevent it from sticking to the pot.
- Allow the paint to dry fully. If desired, repeat the process with different stencils and colors to create a layered effect.
Drip Paint Pots
(Ages 6-14)
Create a vibrant, abstract design by dripping or drizzling paint onto the pot. This technique allows children to experiment with color mixing and layering, and it can produce stunning results. Encourage your child to be as creative and messy as they like – this is part of the fun!
Materials:
- Terracotta pots
- Non-toxic acrylic paint in various colors
- Paintbrushes or squeeze bottles
Instructions:
- Choose a variety of paint colors with your child.
- Hold the pot at an angle. Using a squeeze bottle or cup full of paint, apply the paint at the top edge of the pot and let it drip down the sides. You can also try drizzling the paint from above to create different effects.
- Experiment with layering different colors and changing the angle of the pot to control the direction of the drips.
- Allow the paint to dry fully between layers to prevent the colors from mixing too much and becoming muddy.
- Once your child is happy with their design, let the pot dry completely before use.
String Art Pots
(Ages 6-14)
Using yarn dipped in paint, children can create intricate string art designs on their pots by wrapping the soaked yarn around the pot. This activity helps develop fine motor skills, hand-eye coordination, and patience while creating a unique and eye-catching planter. You can just let the soaked yarn make designs or you can take it up a level by trying to pull the string through wet paint. String pulling is quite a bit tougher than just laying the designs on without pulling so don't set your expectations so high that you end up disappointed. It's a beautiful effect though!
Materials:
- Terracotta pots
- Yarn
- Non-toxic acrylic paint in various colors
- Disposable gloves
- Paint tray or shallow dish
- Plastic sheet or newspaper to cover the work area
- Clear acrylic sealer (optional)
Instructions:
- Start with a clean, dry pot.
- Cover the work area with a plastic sheet or newspaper to protect it from paint drips.
- Cut a long piece of yarn, long enough to wrap around the pot several times.
- Pour some paint into the paint tray or shallow dish.
- Wearing disposable gloves, dip the yarn into the paint, making sure it is thoroughly coated.
- Gently squeeze the excess paint from the yarn, so it is not dripping but still well-coated in paint.
- Hold one end of the yarn against the pot, and begin to wrap the yarn around the pot, creating an intricate string art design. Encourage your child to experiment with different wrapping techniques, such as crossing the yarn, looping it, or creating diagonal patterns.
- Once the design is complete, carefully cut the yarn and press the end against the pot to secure it.
- Let the pot dry completely.
- If desired, apply a clear acrylic sealer to the pot to protect the paint. Make sure to let the sealer dry fully before using the pot.
This activity helps develop fine motor skills, hand-eye coordination, and patience while creating a unique and eye-catching planter. It can be a bit messy, so be prepared for some paint drips and spills during the process. The end result, however, is a beautiful and unique pot that your child can be proud of.
Yarn-Wrapped Pots
(Ages 6-14)
Using colorful yarn or natural twine and glue, children can wrap pots in various patterns and textures, creating a cozy, handmade look. This activity helps develop fine motor skills and hand-eye coordination while encouraging creativity and patience.
Materials:
- Terracotta pots
- Yarn or twine in various colors and thicknesses
- Non-toxic craft glue
- Scissors
Instructions:
- Begin by making sure your pot is clean and dry.
- Apply a small amount of craft glue to the bottom edge of the pot.
- Press the end of the yarn into the glue, and wait for it to dry a bit so that the yarn is secure.
- Continue to apply glue around the pot in small sections, and wrap the yarn around the pot, pressing it into the glue as you go. Make sure to keep the yarn tight and close together so that the pot doesn't show through.
- Change colors or thicknesses of yarn as desired to create patterns or textures. To change the yarn, simply cut off the first color and glue down the end, then glue the end of the new color of yarn next to it and continue wrapping.
- When you reach the top of the pot, cut the yarn and secure the end with extra glue.
- Let the pot dry fully before using it.
This yarn-wrapped pot activity can be a calming and engaging project for kids, and the finished pots add a warm and cozy touch to any room or garden setting. Plus, children will love the tactile experience of working with different types of yarn, and they'll get a sense of satisfaction from creating something beautiful and functional.
Fabric-Covered Pots
(Ages 7-15)
Choose fabric scraps with your child and use fabric glue or decoupage medium to adhere the fabric to the pot. This activity allows children to explore different textures, patterns, and colors while creating a unique and personalized planter.
Materials:
- Terracotta pots
- Fabric scraps in various patterns and colors
- Fabric glue or decoupage medium (like Mod Podge)
- Paintbrush
- Scissors
Instructions:
- Ensure the pot is clean and dry. Dirt or dust can prevent the fabric from adhering properly.
- Choose fabric scraps with your child. You can use different patterns, colors, and textures to create a truly unique design.
- Cut the fabric into shapes or strips that will fit onto the pot. You can create a design plan beforehand or let your child arrange the fabric pieces as they go.
- Using a paintbrush, apply a thin layer of fabric glue or decoupage medium to a small section of the pot.
- Press a piece of fabric onto the glue, smoothing out any wrinkles or bubbles.
- Continue applying glue and fabric pieces until the pot is covered.
- Once the entire pot is covered, apply a final layer of fabric glue or decoupage medium over the fabric to seal it. This will also help to protect the fabric from moisture and wear.
- Allow the pot to dry completely before using it.
This activity is a fantastic way for children to experiment with different colors, patterns, and textures. They'll enjoy the process of selecting fabric and arranging it on the pot, and the final result is a beautiful, personalized planter that they can use for their favorite plants or as a decorative item in their room.
Clay Embellished Pots
(Ages 7-15)
Using air-dry clay or oven-bake clay, kids can create decorative elements such as flowers, animals, or geometric shapes to attach to the pot. This activity encourages sculpting skills and creativity, resulting in a truly one-of-a-kind planter.
Materials:
- Terracotta pots
- Air-dry clay or oven-bake clay
- Acrylic paint (optional)
- Non-toxic craft glue (if using air-dry clay)
- Paintbrushes (if painting)
Instructions:
- Start with a clean and dry terracotta pot.
- Give your child a chunk of clay and encourage them to create decorative elements such as flowers, animals, or geometric shapes. Younger children might need help forming more intricate designs.
- If using air-dry clay, allow the clay decorations to dry as per the instructions on the package. If using oven-bake clay, bake the decorations according to the package instructions. Make sure an adult does the baking step.
- Once the clay decorations are dry and cool, they can be painted using acrylic paint if desired. Let the paint dry completely.
- Attach the clay decorations to the pot using craft glue (for air-dry clay) or according to the instructions for oven-bake clay. Let the glue dry fully before moving the pot.
- Once everything is dry, your clay embellished pot is ready to use!
This project not only offers a fun and creative outlet but also helps in developing hand-eye coordination, patience, and fine motor skills. Plus, they'll end up with a beautifully decorated pot that's truly unique.
Marble-Painted Pots
(Ages 8-16)
Layer acrylic paint and nailpolish on top of warm water in a 5 gallon pail and then dip your pot into it to create a pretty marble effect. This activity teaches kids about cause and effect while sparking their creativity.
Materials:
- Terracotta pots
- Acrylic paint in various colors (optional)
- Nail polish in various colors (great way to use up old nail polish)
- Warm water
- A 5-gallon bucket or large plastic container
- Disposable gloves
- Clear acrylic sealer (optional)
Instructions:
- Start with a clean terra cotta pot.
- Put on disposable gloves to protect your hands. Hold the pot at the base, and slowly dip it into the water and nail polish mixture. Rotate the pot to cover all sides with the marbled polish.
- Fill the 5 gallon bucket or container with warm water.
- Working fairly quickly once you've got your bucket full of water:
- Carefully pour acrylic paint onto the surface of the water. The paint should spread out and float on the surface.
- Pour nail polish onto the surface of the water. The polish should spread out and float on the surface.
- Add a few drops of another color of nail polish. The second color should spread out and create a marbled effect with the first color.
- Slowly remove the pot from the water, and gently rock it around a bit to make any excess nail polish adhere or drip off.
- Set the pot aside to dry completely.
- If desired, finish the pot with a clear acrylic sealer to protect the nail polish design.
- Repeat the process for each pot, adding more nail polish to the water as needed.
This is a fun and creative activity that can produce some truly beautiful and unique pots. However, because it involves nail polish and potentially messy drips, it's a good idea to cover your work area with newspapers or a drop cloth, and ensure the room is well-ventilated.
Painted Landscape Pots
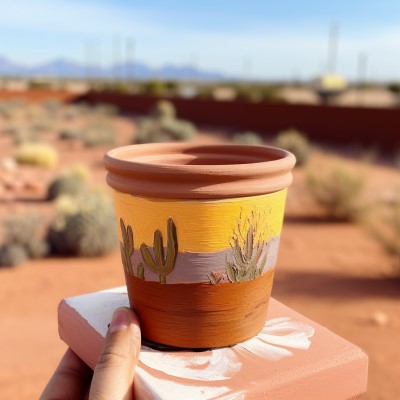 (Ages 8-16)
Challenge older children to paint a detailed landscape or cityscape on their pot. This activity helps develop painting skills and encourages patience, planning, and attention to detail.
Materials:
- Terracotta pots
- Non-toxic acrylic paint in various colors
- Paintbrushes of various sizes
- Clear acrylic sealer (optional)
- Cup of water and paper towels for cleaning brushes
- Pencil (optional)
Instructions:
- Ensure the pot is clean and dry.
- If your child feels comfortable doing so, they can sketch out their landscape or cityscape design on the pot lightly with a pencil. This step can be skipped if they prefer to paint directly onto the pot.
- Start painting the pot, working from the background to the foreground. For a landscape, this might mean painting the sky first, then the distant mountains or trees, and finally the closer details. For a cityscape, they might paint the sky and the distant buildings first, then add the closer buildings and details.
- Encourage your child to take their time and pay attention to the details. They might want to use smaller brushes for the finer parts of the design.
- Once the painting is complete, let the pot dry completely.
- If desired, apply a clear acrylic sealer to the pot to protect the painting. Make sure to let the sealer dry fully before using the pot.
This project is more challenging and time-consuming than some of the others, but it's a great way for older kids to develop their painting skills and create a truly unique and beautiful piece of art. Plus, they'll end up with a pot that's not just a planter, but also a piece of home decor that they can be proud of.
Comic Book Pots
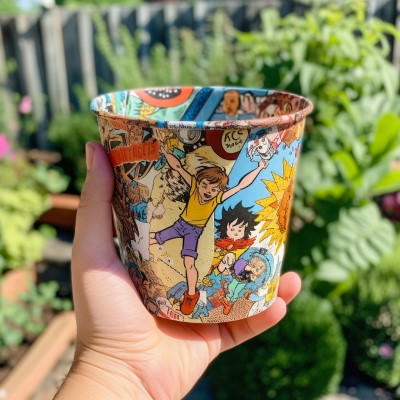 (Ages 8-16)
Using old comic books or magazines, children can cut out panels, characters, or other interesting images and collage them onto the pot with decoupage glue. This activity encourages creativity, storytelling, and an appreciation for art and literature.
Materials:
- Terracotta pots
- Old comic books or magazines
- Scissors
- Decoupage glue, like Mod Podge
- Paintbrush
- Clear acrylic sealer (optional)
Instructions:
- Start with a clean, dry pot.
- Let your child browse through the comic books or magazines and cut out panels, characters, or other images that they find interesting. They might choose to follow a theme or just select images that they like.
- Arrange the cutouts on the pot before starting to glue. This will give your child a chance to plan their design and make sure they have enough images to cover the pot.
- Once they're happy with their design, use a paintbrush to apply a thin layer of decoupage glue to a small section of the pot.
- Press a comic book cutout onto the glue, smoothing out any wrinkles or bubbles.
- Continue applying glue and cutouts until the pot is covered.
- Apply a final layer of decoupage glue over the entire pot to seal the cutouts and give the pot a glossy finish.
- Let the pot dry completely.
- If desired, you can apply a clear acrylic sealer to the pot to provide extra protection for the comic book images.
This project is a fun and creative way for kids to express their interests and create a truly unique and personal pot. It also encourages them to think about storytelling and composition as they select and arrange their comic book cutouts.
Geometric Patterned Pots
(Ages 10-16)
Using painter's tape or masking tape, kids can create geometric patterns on their pots before painting them. This activity teaches precision and patience while producing a modern and stylish planter.
Materials:
- Terracotta pots
- Non-toxic acrylic paint in various colors
- Painter's tape or masking tape
- Paintbrushes of various sizes
- Cup of water and paper towels for cleaning brushes
- Clear acrylic sealer (optional)
Instructions:
- Start with a clean, dry pot.
- Use the painter's tape or masking tape to create geometric patterns on the pot. The tape will block the paint, so the areas covered by the tape will remain the original color of the pot. Kids can create any pattern they like, such as stripes, triangles, squares, or a combination of shapes.
- Once the tape is in place, begin painting the pot. Kids can use different colors for different sections of the pot, or they can use one color for a more monochromatic look.
- Let the paint dry slightly, but not completely. This will make removing the tape easier and will help to keep the lines crisp and clean.
- Carefully remove the tape from the pot, revealing the geometric design.
- Let the pot dry completely.
- If desired, apply a clear acrylic sealer to the pot to protect the paint. Make sure to let the sealer dry fully before using the pot.
This project is a fun and creative way to teach kids about geometric shapes and patterns. It requires precision and patience, but the end result is a modern and stylish pot that would look great in any room or garden. Plus, they'll have the satisfaction of knowing they created it themselves!
Mosaic Pots
(Ages 12-16)
Break up old or unused tiles, plates, or glass pieces and let your child create a mosaic design on the pot using waterproof glue. For younger children use precut tiles from the craft store. This activity encourages creativity, pattern recognition, and fine motor skills while producing a stunning and unique planter.
Materials:
- Terracotta pots
- Optional: Precut 1 inch tiles from the craft store
- Old or unused tiles, plates, or glass pieces
- Waterproof glue like E6000 Craft Adhesive
- Grout (optional)
Instructions:
- Break up the tiles, plates, or glass pieces into smaller chunks or use small precut tiles from the craft store. Make sure to handle this step yourself to protect younger children from sharp edges.
- Let your child arrange the pieces into a design on the pot, attaching them with waterproof glue.
- Allow the glue to dry completely.
- (Optional) If you want a more finished look, you can apply grout between the mosaic pieces. Make sure to wear protective gloves and follow the grout's instructions carefully. Allow the grout to dry completely before using the pot.
These 20 DIY decorated pot projects are perfect for gardening with children of all ages. They not only provide a creative outlet and bonding experience for you and your child but also teach valuable skills and foster a love for gardening. So grab some pots, gather your supplies, and start creating beautiful planters together – your garden will thank you!
 About Leanne:
Wife, mom and the woman behind the scenes of the DLTK's Crafts for Kids websites. The websites are a terrific hobby -- run by (me) Leanne, a mom with two girls as my official craft testers and my husband as my technical support. DLTK are the first initials of each of the people in my family (I'm the L!). Whenever we send out little cards or whatnot, we sign 'love DLTK' ... when I started the website I used the initials. Had I known the website would get actual strangers visiting it, I would have picked a less mysterious name but we're all stuck with it now!
You can view my other blog posts here.

About DLTK's Crafts for Kids:
DLTK's Crafts for Kids is a website filled with fun and creative craft ideas for children of all ages. With easy-to-follow instructions and printable templates, kids can explore their imagination and create a wide variety of crafts from paper crafts to holiday-themed projects.