DLTK's Crafts for Kids
Emoji Corner Bookmark
 I love reading, so naturally I also love to make bookmarks! When I was younger I would make a different bookmark nearly every week; obviously I had to keep making new ones because my favourite colors and animals kept changing... *giggle*
I've only recently discovered this new way of creating corner bookmarks, using origami skills. I love how tidy and organized these bookmarks are. You can use multiple in a book if you are tryinging to keep track of things, they don't fall out of the book so there is no chance of you losing your page, and they are absolutely adorables, especially with an emoji theme!
 We have also made several template options that you can print in color or B&W and fold to create a corner bookmark! This is much easier in terms of scissor skills, so it is a great option for younger children.
Below are all of the instructions for making a corner bookmark from scratch and a variety of templates to suite an adorable Emoji theme.
Materials:
- if making from scratch, coloured paper (yellow, red, blue, white; depending on emoji faces you want to make),
- printer,
- crayons or something else to color with (for b&w print version)
Instructions:
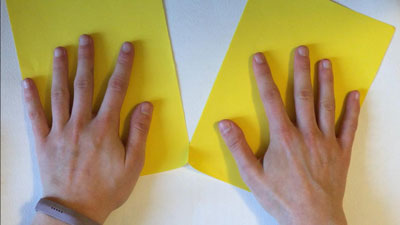 Cut or fold & rip a piece of A4 paper in half. (I find that using half a paper makes a better size bookmark because it works for a variety of book sizes.)
 Turn the rectangle of paper into a square, click here for instructions.
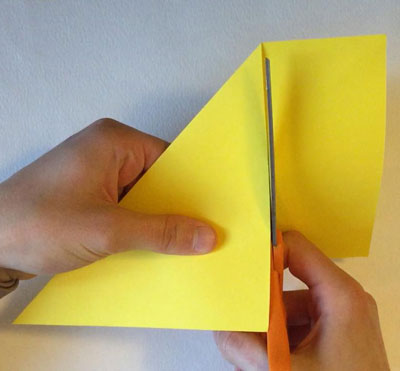
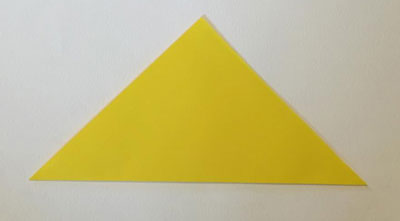 Valley fold paper from corner to corner, making a triangle.
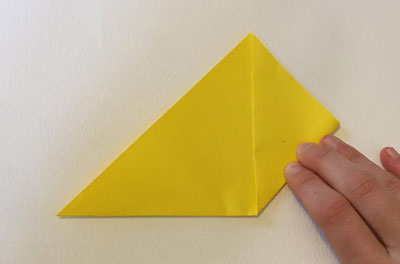 Fold the left bottom corner of the triangle up to the top corner. Do the same with the top corner.
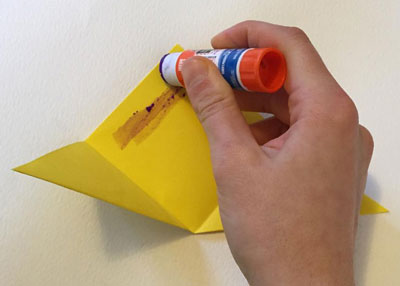 Glue the folds into place; the paper should look like a diamond now.
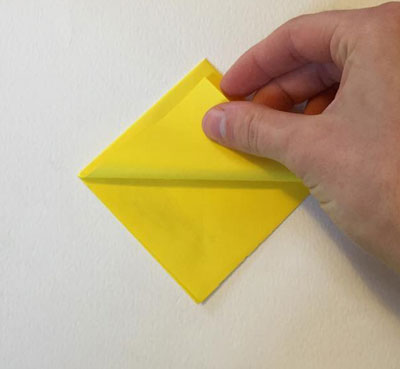 Turn the paper over. Fold the bottom corner (only the top layer of paper) of the daimond up to the top corner.
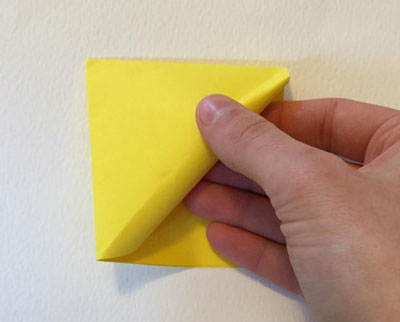 This part is a bit tricky: unfold the fold you just made and fold it in the opposite way. You will have to fold it underneath and it will create a little pocket.
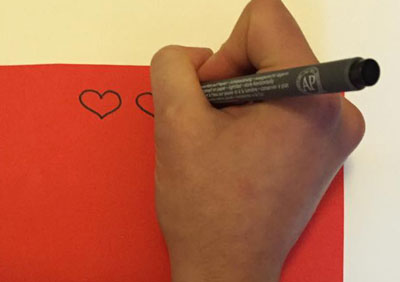 Draw the emoji face you want onto the appropriate coloured paper and cut out the pieces.
 Glue the pieces onto the top half of the daimond (the outside of the pocket). This is the part that will show up when the bookmark is on the book.
 Draw on the mouth and eyebrows with a crayon or marker.
 Mix it up and make different faces using different coloured paper.
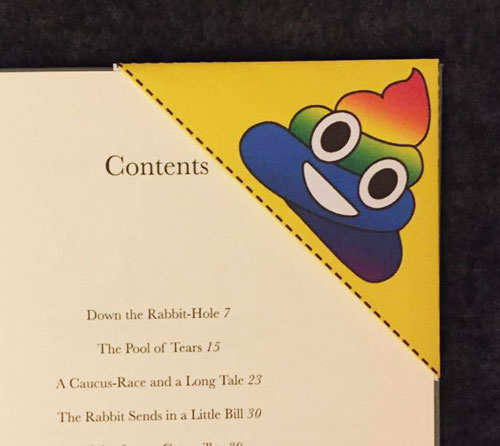
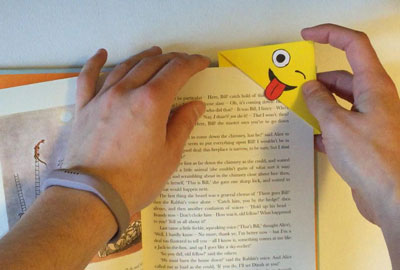 To use the book mark tuck the corner of your page into the pocket of the bookmark.
Craft Templates:
- Close the template window after printing to return to this screen.
- Set page margins to zero if you have trouble fitting the template on one page (FILE, PAGE SETUP or FILE, PRINTER SETUP in most browsers).
Laughing Corner Bookmark (color) or (B&W)
Goofy Corner Bookmark (color) or (B&W)
Heart Eyes Corner Bookmark (color) or (B&W)
Blowing a Kiss Corner Bookmark (color) or (B&W)
Rainbow Poop Corner Bookmark (color) or (B&W)
Printable version of these instructions