DLTK's Crafts for Kids
Bullet Journal Ideas
contributed by Kaitlyn Guenther
 Journaling has always been something I am interested in. When I was younger I would try to write the normal journal entry, "Dear Diary..." and so on. I'd usually give up on it after a couple of weeks because I got bored. When I was a teenager I started journaling with photos and paintings; it was much more creative—almost like a scrapbook.
I recently discovered bullet journalling and it revolutionized my journalling style! It is fun and creative, but not too time consuming. You can use your journal to record lists, to write entries every day or some days, or even to make graphs.
Below I've given information and instructions on some of my favourite bullet journalling ideas and how you can make a creative bullet journal to suit your unique journalling needs!
Gratitude Lists:
I often find that journalling helps me reflect on the day or the week and put my thoughts together. I like to use that time to focus on the good rather than the bad, so I like to include gratitude lists into all of my journals.
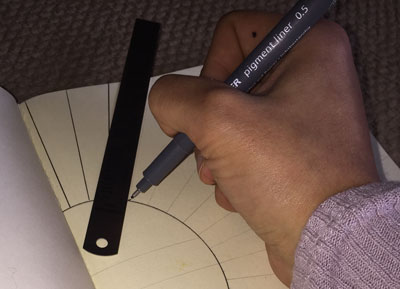 Use a protractor and a ruler (or just freehand) to draw a sun with rays.
 In the center of the sun write the title and in each ray of sunlight write something you are thankful for.
To Do Lists:
I'm not a huge fan of to-do lists because they tend to feel relatively messy, but with bullet journals creating to do lists is very effective. I don't make to-do lists everyday, but if there is something that is causing me lots of stress a to-do list really helps to get my thoughts in order.
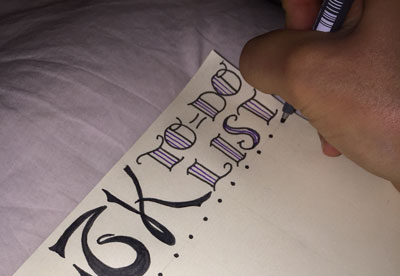 Create a nice title to describe your to-do list.
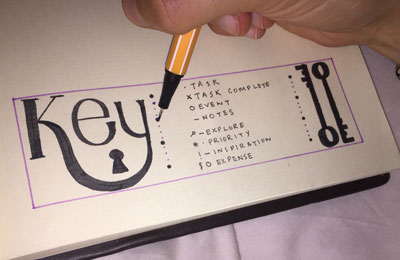 Make a key to suit the needs of your to-do list. The key can include things like: task, task complete, event, notes. If you want a more indepth to-do list you can add more descriptions for each point, like: priority, expense, inspiration, explore.
 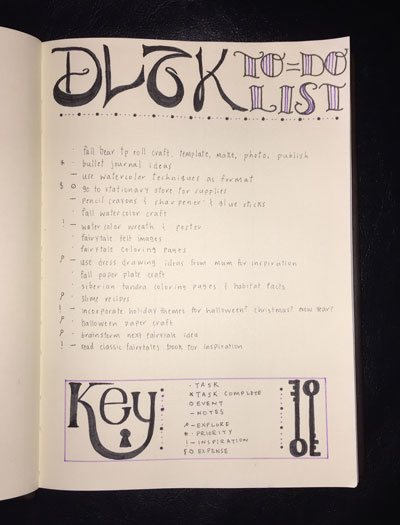 Fill in the rest of the page with your to-do's.
Goal Pages:
My goal pages are like to-do lists except focused on one topic. I like to add a creative twist to each of my goal pages to give myself an extra sense of accomplishment when I work towards achieving that goal!
 Draw or organize a visual representation of your goal (in the tips below I have outlined some possibilities).
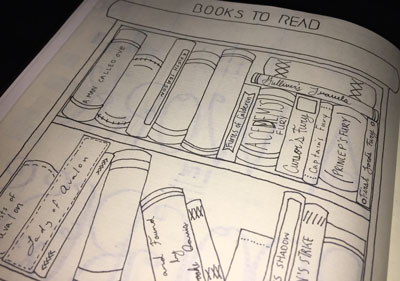 Write your different goals into the visual representation you have created.
  When you have accomplished a piece of your goal, color in a piece of your visual representation.
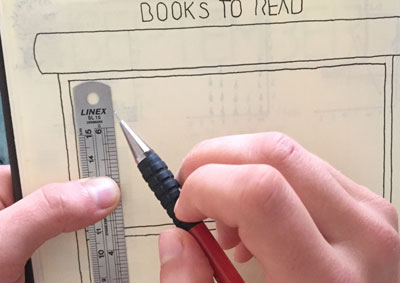
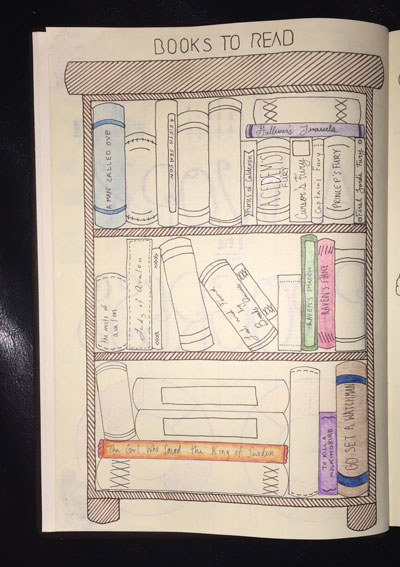 TIP: Use a bookcase for the visual representation of a "Books to Read" page.
 TIP: Use popcorn or a movie real for the visiual representation of a "Movies to Watch" page.
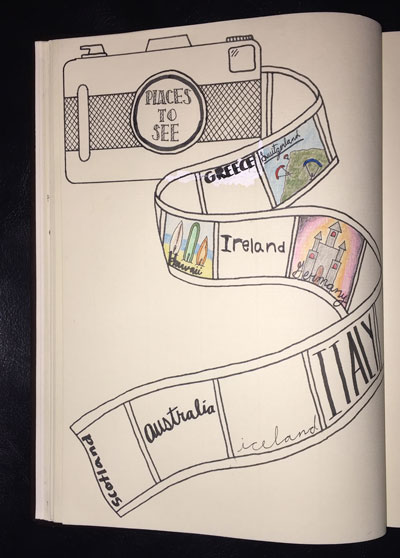 TIP: Use a map, flags, or a camera for the visual representation of a "Places to See" page.
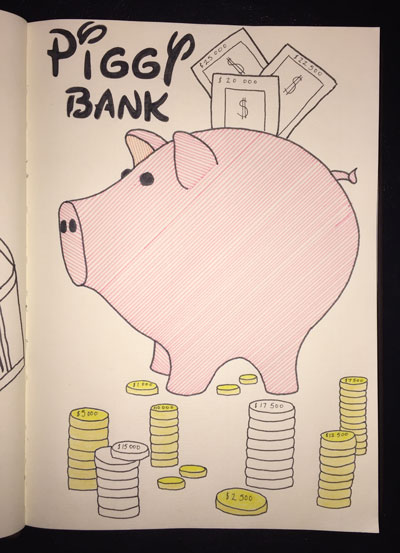 TIP: Use notes or a piggy bank for the visual representation of a "Money to Save" page.
Weekly Tracking:
I have a very busy schedule and can't make a seperate, ellaborate page for each day, so I set aside time each week to make a weekly tracking page. Then everyday I spend a small amount of time keeping track of things like my steps, the amount of water I drink, or just general things that I did that week.
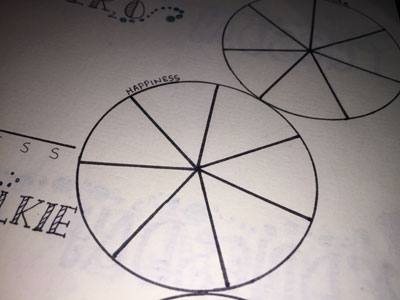 Brainstorm what sort of things you want to track: sleeping habits, simple activities, daily mood/happiness levels?
 Use pencil case tools (rulers, protractors, pencil, pens) to draw out your weekly tracking pages. Feel free to get creative with different drawings, fancy titles, etc.
 Design a format that works best for you. There are lots of different graphs that can help you organize your thoughts and goals. Try standard bar graphs, line graphs, or even pie charts (yum!).
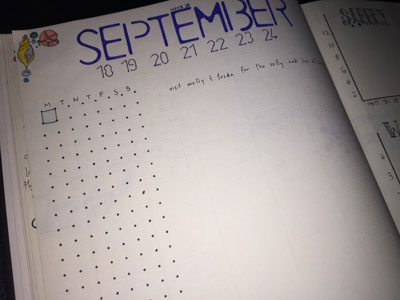 Now that it is all set up you can fill in your weekly tracking page each night!
TIP: Use a different theme for each week to add a creative flare!
TIP: If something on your weekly tracking page isn't useful, don't be afraid to make changes. It might take a few weeks to find a system that works for you!
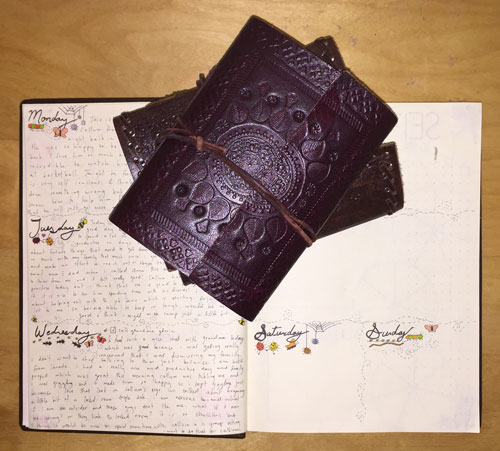
Daily Entries:
I like to set aside some space to write down my thoughts in the tradtional journalling fashion. Just like with my weekly tracking pages I set aside time each week to create a fun page devoted to daily entries. Then each night I spend five or ten minutes writing down my thoughts.
 Use a protractor and a ruler (or just freehand) to seperate the page or pages into 7 sections. The easiest way to divide the page is to use a standard agenda approach: a full section for each weekday and half a section for both saturday and sunday.
TIP: Bring the weekly theme into these pages as well to create a link between the daily entry pages and the weekly tracking pages (in the examples, my pages were all ocean themed!).
Weekly Meal Planning:
I go grocery shopping about once a week for all of the things that I will need for my meals. Incorporating a meal plan into my bullet journal helps me to plan ahead and get excited about cooking.
 Use a protractor and a ruler (or just freehand) to organize a layout that will help you plan your meals effectively.
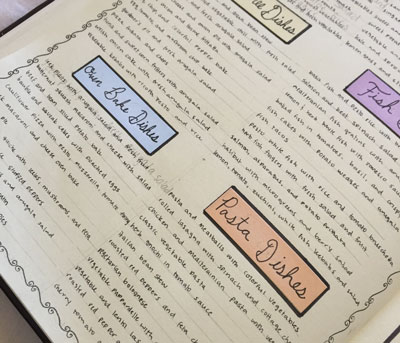 Brainstorm the different kinds of meals you might want to make and write out an organized list to look at when planning.
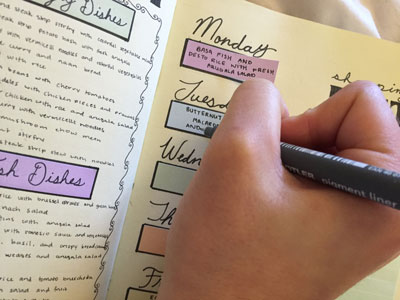 Use sticky notes and color coordinate while planning out the weekly meal.
 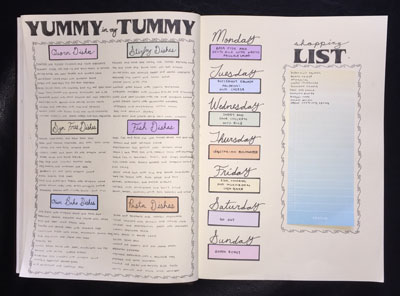 Add any food that you don't already have at home to the weekly shopping list.
TIP: For younger kids who might not cook a dinner, they can use the meal planning idea to help plan their school lunches and snacks or even breakfasts for the week.
TIP: If you use sticky notes to plan the weekly meals and write out the shopping list then you only have to organize the layout page once and you can reuse the same page each week.
Print friendly version of these instructions