DLTK's Crafts for Kids
Origami Windmill
 Contributed by
Leanne Guenther
You can attach your windmill to a paper cup, pencil or gift tag with a pushpin or brass tack and it will really spin!
If you have trouble with the instructions, try reading through the basic origami instructions section.
Materials:
- square of paper - click here for instructions to make a rectangle of paper (typical 8.5x11 sheet) into a square.
- NOTE: origami paper typically comes with each side a different color -- this is perfect for this project!! You can find double sided origami paper at your local craft store -- it is inexpensive.
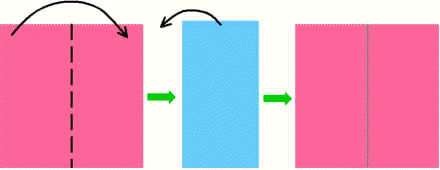 Instructions:
- Valley fold the paper from the left edge to the right edge, crease well and then unfold.
 Valley fold the paper from the bottom edge to the top edge, crease well and then unfold.
 Valley fold the paper from the bottom left corner to the top right corner, crease well and then unfold.
 Valley fold the paper from the bottom right corner to the top left corner, crease well and then unfold.
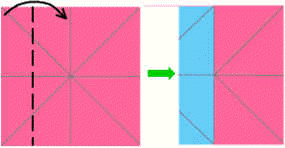 Valley fold the left edge over to meet the center line. Crease well.
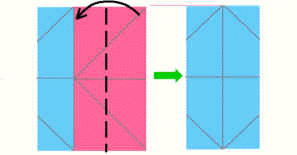 Valley fold the right edge over to meet the center line. Crease well.
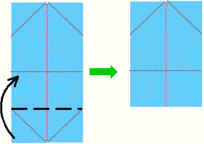 Valley fold the bottom edge up to meet the center line. Crease well.
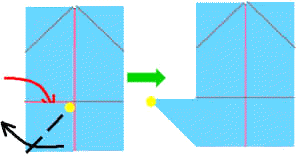 Reach under the top layer of paper of the part you just folded. Do the left side first. Use the prefolds as a
guide and pull the paper outwards to make a triangle. Crease well.
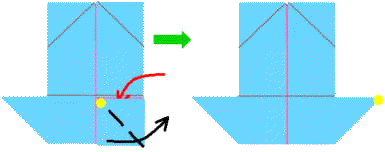 Repeat with the right side. You will now have a canoe shape.
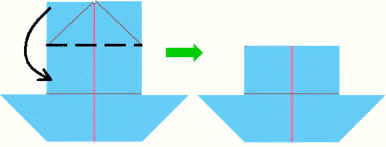 Valley fold the top edge to the center. Crease well.
 Reach under the top layer of paper of the part you just
folded. Do the left side first. Use the prefolds as a guide and pull the paper outwards to make a triangle. Crease well.
 Repeat with the right side. You will now have a canoe shape on the top too.
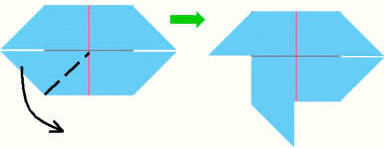 Valley fold the bottom left corner down.
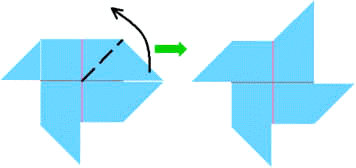 Valley fold the top right corner up.
- Attach to a paper cup or similar to make a windmill or to a pencil to make a pinwheel you can play with


Print friendly version of these instructions