DLTK's Crafts for Kids
 Apple Pencil Holder
Whether you make it for your teacher or to hold pencils in your study room, this paper mache apple pencil holder is sure to bring a smile to your face every time you see it!
This is also a good "Welcome to School" gift for an older sibling to give to a younger child!
Materials:
- balloon,
- paper mache paste
- strips of newspaper
- strips of white paper (3 sheets or so of old computer paper works well),
 red tempra/poster paint (or red tissue paper or red napkins),
- green felt or green construction paper
Instructions:
- prepare your paper mache paste (read my "How to Paper Mache" section if you don't know how this is done).
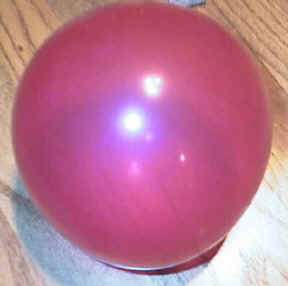
- Blow up the balloon ALL THE WAY and then let all the air out
- now blow up the balloon a little bit (until it has about a 5 inch diameter) and tie it
- blowing it up all the way and letting the air out first,
will make the apple more round.
 Cover with 2 to 4 layers of newspaper paper mache and let it dry.
- About 24 hours to dry unless you leave it somewhere sunny and warm
- don't cover the tied part (this will be the hole for the pencils).
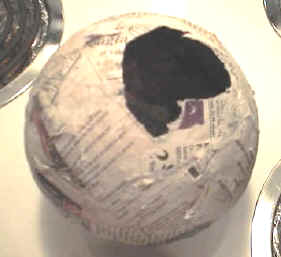
- Cover with 2 to 4 layers of white computer paper (it's much easier to paint over than newspaper!) and let dry
- Reach through the hole with a sharp pin and pop the balloon.
- If you can, pull out the balloon bits
- IF NECESSARY: Take a fairly damp cloth and widen the hole (for the pencils) to the desired size (you can see from the photo above how large we made our hole). The damp cloth will soften the mache so you can work with it. Be patient and let it soften!
- Crush the bottom of the apple so that it stands without help. You won't be able to crush it when it's all dry, so use a damp cloth (or set the apple on a damp paper towel for about 15 minutes) to soften the mache. Then push gently to make a flat surface on the bottom.
- Paint the apple red. If you covered with white computer paper,
this should only take one coat.
- If you're using tissue paper or napkins, tear into small pieces and paper mache them onto the apple in a final layer to turn it red.
- Let dry
- Optional: Give the apple a coat or two of spray varnish (I
always have a can of this around for projects the girls are
especially proud of, to waterproof them and ensure they last longer).
- Cut two simple leaf shapes from green felt or construction paper and glue to the top of the apple.
- Add a couple of sharp new pencils and present to your teacher (or to a child who is just starting school).
Print friendly version of these instructions