DLTK's Crafts for Kids
DIY Clay Gnome Faces: A Fun and Easy Tutorial
Are you looking for a fun and engaging DIY craft project that you can enjoy at any age? Look no further! In this guide, we will explore how to create adorable clay gnomes using homemade salt dough clay. These charming little figures make for wonderful home decorations, charming gifts, or even a whimsical addition to your garden. With a unique leaf-shaped hat and beard, and a cute little nose peeking out, these gnomes are sure to bring a smile to anyone who sees them. No advanced crafting skills are needed - all you need is a little imagination and the willingness to get your hands a bit messy. Let's dive in and get started on creating your very own clay gnome!
Materials:
- Salt dough clay (home made or purchased)
- Air Dry Clay
- Air Dry Clay #2
- Air Dry or Bake Clay - basic, three ingredient recipe, can be colored with tempra paint.
- Air Dry or Bake Clay #2 - dries whiter than the previous version, but requires cooking
- Air Dry Sawdust Clay - clay dries to a very hard finish
- Rolling pin
- Toothpick
- Oven (if you plan on baking your gnome for faster drying)
- Acrylic paints and brushes (optional, for decoration)
- Clear acrylic sealer or varnish (optional, for protection and a glossy finish)
Instructions:
- Prepare the salt dough clay: Follow the provided salt dough clay recipe to prepare your dough. Make sure it's well kneaded and ready to shape.
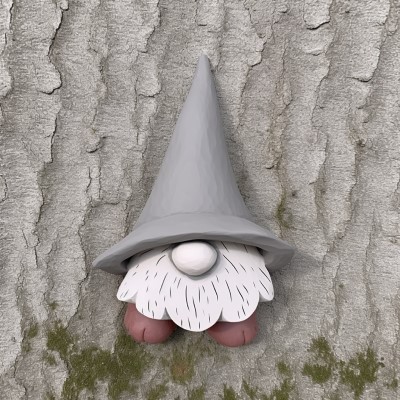
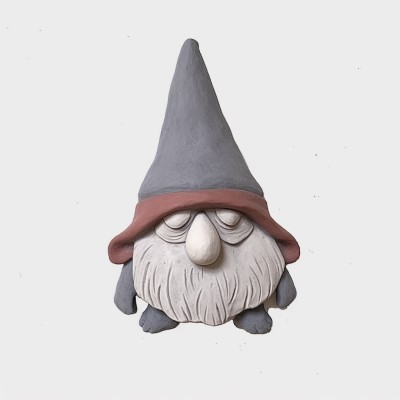
- Shape the hat: Take a portion of the clay and roll it out to about 1/4 inch thickness. Cut or shape it into a leaf or water drop shape. This will serve as the gnome's face and hat. Set it aside for now.
- Create the beard: Roll out another portion of the clay to a similar thickness as the hat. Cut or shape it into a smaller leaf shape. Using a toothpick, draw lines into the clay to resemble the texture of a beard.
- Form the nose: Roll a small amount of clay into a ball. This will serve as the gnome's nose. Attach the nose to the top center of the beard.
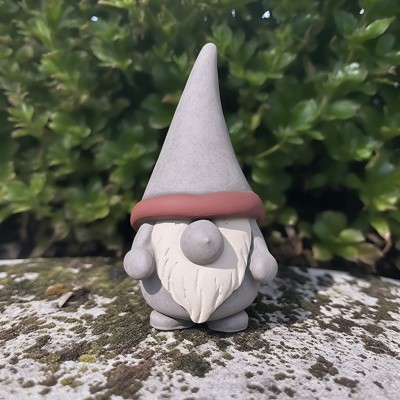
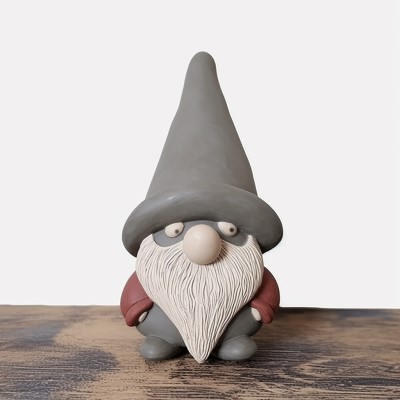
- Assemble the gnome: Position the beard and nose piece at the bottom center of the hat piece. Make sure the beard piece is slightly overlapping the bottom of the hat piece. The nose should stick out above the beard.
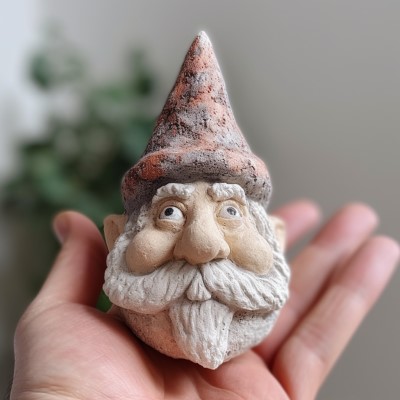
- Shape the hat brim: Roll out a small coil of clay and place it on the hat just above the nose. This will serve as the hat brim that appears to be covering over the gnome's eyes. (or place the hat brim a bit higher and add a couple of small clay eyeballs).
- Optional: You can add an oval body with little round hands and oval feet to your craft if you like or just leave it as a gnome face
- Dry your gnome: At this point, you have two options:
- Air-drying: Leave your gnome out at room temperature in a dry, breezy location for 48 hours.
- Oven drying: Preheat your oven to 300 degrees Fahrenheit and bake your gnome on a baking sheet for about 30 minutes or until it's hardened.
- Paint your gnome (optional): Once your gnome is completely dry, you can paint it using acrylic paints. You might want to give the hat and beard different colors, and perhaps even give the nose a rosy hue. Let the paint dry completely.
- Seal your gnome (optional): After the paint has dried, you can seal your gnome with a clear acrylic sealer or varnish. This will give it a glossy finish and help protect the paint from chipping or fading. Let the sealer or varnish dry completely.
 Those are the basics. Feel free to get as creative as you want.
Congratulations! You've just made your very own clay gnome. Whether you place it on a shelf, use it as a holiday decoration, or give it as a gift, this little gnome is sure to bring a touch of whimsy and charm.
Happy crafting!
Leanne
Print friendly version of these instructions.