DLTK's Crafts for Kids
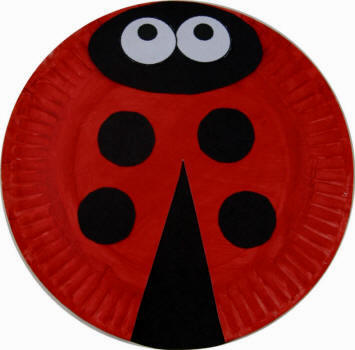
Ladybug Paper Plate Craft
Materials:
- printer and paper (if using the template pieces)
- black construction paper (if not using the template pieces).
- Paper plate
- red paint and paintbrush
- scissors,
- glue
- Optional: wiggly eyes
Instructions:
- Optional: Cut a triangle from the paper plate, slightly smaller than one on the template. I think the ladybug looks better (the wings look more real) when you cut the triangle out and glue the template piece underneath than when you just glue the template piece on top.
- Paint the bottom of the paper plate red. Let the plate dry. You can continue with the other steps while it dries.
- Print out the template. Color the template pieces (if using the B&W version) and cut them out.
OR
Cut out four circles as ladybug spots, a medium sized oval head and a large triangle from black construction paper. - When the plate is dry, glue the large triangle onto the body to make wings. If you cut a triangle from your plate, glue the black piece onto the inside of the plate, otherwise glue it on top.
- Glue the spots onto the wings (two on each side).
- Glue the oval head onto the ladybug body.
- Glue wiggly eyes, the eyes from the template or eyes you make from white paper onto the head.
Template:
- Close the template window after printing to return to this screen.
- Set page margins to zero if you have trouble fitting the template on one page (FILE, PAGE SETUP or FILE, PRINTER SETUP in most browsers).
Ladybug Paper Plate Template Color or B&W
Print friendly version of these instructions